How to Check What PSU You Have: 6 Easy Ways in 2026
Tyler had waited all summer for this moment. His new graphics card was finally installed, the drivers were fresh, and his favorite game was loading in glorious high settings. Ten minutes into the first match, the screen went black. No warning, no blue screen. The fans just stopped, and the room went silent.
He pressed the power button. The PC came back to life as if nothing had happened. Twenty minutes later, in the middle of a boss fight, it died again.
Tyler searched the error online and found the same answer in every forum: “What PSU do you have?” He had no idea. The PC was a hand-me-down from his older brother, Mike, who had built it years ago and lost the box long before Tyler got it. Tyler opened Device Manager. Nothing. He checked Task Manager. Nothing. He downloaded two hardware tools. Still nothing about the power supply.
If that sounds familiar, you are in the right place. Learning how to check what PSU you have is one of the most useful PC skills you can pick up, especially before a GPU upgrade. By the end of this guide, you will know exactly how Tyler found his answer that same evening, and how you can do the same.
Quick Answer
Windows cannot show your power supply model or wattage. The fastest ways to find it are your original box, receipt or online order history, a peek through the case vents, or your prebuilt PC’s service tag on the maker’s support site. The most reliable way is to switch off the PC, open the side panel and read the label on the PSU itself. Only a few smart “digital” PSUs can be read with software.
Why Windows Can’t Tell You What PSU You Have
Your CPU, GPU, RAM and drives all talk to Windows. That is why Device Manager and tools like CPU-Z can name them instantly. A normal power supply does not talk to your PC at all. It just sends power down its cables. There is no data connection, no chip reporting a model name, and nothing for Windows to read.
That is why so many people get stuck where Tyler did. Software can tell you how much power your CPU and GPU are pulling, but it cannot tell you what is supplying that power. The only exception is a small group of digital PSUs with a USB link, which we cover in Method 4.
So the trick is not to search inside Windows. It is to find the PSU’s identity somewhere else: on paper, on a website, or on the unit itself. Here are six ways to do it, from the easiest to the most hands-on.
Method 1: Check the Box, Receipt or Order History
When it comes to how to check what PSU you have, the easiest way is often the most forgotten. If you or someone in your house bought the parts, the answer may already be sitting in a closet or an inbox.
- The original PSU box: the model name and wattage are printed on the front and side.
- Online order history: search Amazon, Newegg, Best Buy or Micro Center for words like “power supply” or “PSU”.
- Email receipts: search your inbox for “PSU”, “power supply” or common brands like Corsair, Seasonic, EVGA, be quiet!, MSI, Thermaltake or Cooler Master.
- Custom build invoices: if a shop or a system builder made your PC, the parts list usually names the exact PSU.
- Old build lists: if the builder used PCPartPicker, the saved list shows every part.
Tyler texted his brother Mike. Mike could not find the box, but he remembered buying the parts on Newegg. Five minutes later, he sent a screenshot of a seven-year-old order. That gave them a name to check. But as you will see, the story did not end there.
Method 2: Peek Through the Vents or the Back of the Case
You can often find out what PSU you have without opening anything.
- Look at the back of the PC where the power cord plugs in. Some PSUs have the brand, model or wattage printed or stickered right next to the power switch.
- Check the bottom of the case. Many cases have a dust filter under the PSU. Pull the filter out and shine a light up through the PSU fan grille. Some brands put the label on the fan side.
- Look through the glass side panel. If the PSU shroud has a cutout or the PSU is visible, the brand logo or the side sticker may show through.
- Use your phone camera. Zoom in and take a photo through the vent. A photo with the flash on is often easier to read than your own eyes.
If you can read the model name, for example “RM750e” or “Focus GX-650”, type it into Google with the brand name. The maker’s page will show you the full specs.
Method 3: Look Up a Prebuilt PC by Its Service Tag or Model
If you own a Dell, Alienware, HP, Lenovo, Acer or another factory-built desktop, the maker usually keeps a record of the original parts, including the power supply.
Step 1: Find your PC’s ID. Look for a sticker on the back, top or bottom of the case. Dell calls it a Service Tag, HP uses a product number and serial number, and Lenovo uses a machine type (MTM) and serial number.
No sticker? Get it from Windows. Right-click the Start button, open Terminal or PowerShell, and type:
Get-CimInstance Win32_BIOS | Select-Object SerialNumberOn most branded PCs, this shows the serial number or Service Tag. The older wmic command you may see in other guides is deprecated and no longer works on many newer Windows 11 PCs.
Step 2: Search the maker’s support site.
- Dell and Alienware: enter the Service Tag on Dell Support and open the original configuration or specifications. Look for a line such as “Power Supply, 500W”.
- HP: search your product number on HP Support and open Product Specifications or the Maintenance and Service Guide, then search the page for “power supply”.
- Lenovo: enter the machine type or serial number on Lenovo Support or Lenovo Parts Lookup.
Important: this shows the PSU the PC shipped with. If someone replaced the power supply later, the website will not know. Prebuilt PSUs are also often custom sizes with fewer connectors, which matters if you plan a GPU upgrade.
Method 4: Use Software (Only Works for Digital PSUs)
Most articles tell you to “just run HWiNFO”. Here is the honest truth: for most power supplies, software shows nothing about the PSU. It only works with digital PSUs that have a USB cable running from the power supply to a USB header on the motherboard.
Examples of PSUs that can report data include:
- Corsair AXi, HXi and RMi series (read in Corsair iCUE)
- MSI MEG Ai series
- Gigabyte AORUS P1200W
- Thermaltake digital (DPS) models
- Some Cooler Master and Enermax digital units
Support varies by model and software version, so check your tool’s supported list.
How to check:
- Download HWiNFO from its official site, or open your PSU maker’s app if it is installed.
- In HWiNFO, choose Sensors only and scroll down. If you see a section with your PSU brand, showing PSU temperature, fan speed or power output, you have a digital PSU and its name is right there.
- No PSU section? Then your power supply is not a digital model, and you need one of the other methods.
What software can still do for you: even with a normal PSU, HWiNFO and GPU-Z show how many watts your CPU and GPU are drawing. That is useful later, when you check whether your PSU can handle an upgrade.
Method 5: Open the Case and Read the PSU Label (Most Reliable)
This is the method that never lies. Whatever the box, the receipt or the website says, the label on the unit tells you what is actually inside your PC today.
Remember Tyler? Mike’s Newegg order said he bought a 650W Gold power supply. But when Tyler opened the case, the label said 450W, from a brand neither of them recognized. Mike then remembered: his original PSU died years ago, and he had grabbed a cheap replacement from a local store. That 450W unit was trying to feed Tyler’s new graphics card. Mystery solved.
Do it safely:
- Shut down Windows and switch off the PSU using the switch on the back (marked I and O).
- Unplug the power cord from the wall or the PSU.
- Press the PC’s power button for 5 seconds to drain leftover power.
- Touch a bare metal part of the case to release static electricity from your body.
- Remove the side panel. On most cases it is the left panel, held by two thumbscrews at the back.
- Find the PSU, usually at the bottom rear, often inside a metal shroud.
- Read the label. It is normally on the side facing the glass panel or on the top. If it faces down or toward the inside, you may need to look with a flashlight and your phone camera, or loosen the PSU’s four rear screws and slide it out slightly.
Safety note: Never open the PSU itself. Its capacitors can hold a dangerous charge even when unplugged, and opening it voids the warranty. Reading the outside label is all you need.
Method 6: No Label? Play PSU Detective
Sometimes the sticker is missing, faded, or hidden in a spot you cannot reach. You can still learn a lot from clues on the unit.
| Clue | What it tells you |
|---|---|
| Brand logo on the fan grille or side | Search the brand plus the fan design to match the series |
| Number and type of GPU connectors | One 6-pin or none usually means under ~450W. Two or more 8-pin (6+2) connectors suggest ~550W+. A native 16-pin 12V-2×6 cable means an ATX 3.x unit, usually 750W or more |
| Modular sockets on the back | Usually a mid-range or better unit, though not always |
| Odd shape or small size | Often a proprietary prebuilt PSU, so check Method 3 |
| Serial number sticker only | Contact the brand’s support with it; many can identify the model |
| No brand, no label at all | Treat it as low quality and plan to replace it before any upgrade |
These clues give you a rough idea, not an exact answer. If your PC is shutting down under load and you cannot identify the PSU, the safest move is to replace it with a known, quality unit.
How to Read a PSU Label Like a Pro
Finding the label is half the job. Knowing what it means is the other half. A PSU sticker is crowded with numbers, but you only need a few of them.
| What you see on the label | What it means | Why it matters |
|---|---|---|
| Brand and model (e.g. RM750e, Focus GX-850) | The exact product | Search it to read reviews and full specs |
| Total wattage (e.g. 750W) | The most power it is rated to deliver | The number most people need |
| +12V rail amps (e.g. 62.5A) and combined watts | How much power the 12V rail can deliver | Your CPU and GPU run almost entirely on 12V, so this matters most |
| +5V and +3.3V amps | Power for drives, USB and some motherboard parts | Rarely a limit in modern PCs |
| AC input (e.g. 100-240V, 10A) | The wall voltage it accepts | Most modern units work worldwide |
| 80 PLUS or Cybenetics logo | Efficiency rating, Bronze up to Titanium or Diamond | Higher means less wasted heat and power |
| ATX 3.0 or ATX 3.1 | The design standard | ATX 3.1 units support the 12V-2×6 GPU connector |
| Serial number or date code | When it was made | Helps you judge its age and warranty |
Quick tip: the 12V rating is more honest than the big number on the front. A cheap “600W” unit might only deliver about 400W on its 12V rail, while a quality 550W unit can put almost all of its 550W on 12V. Always check the 12V line.
Can Your PSU Handle Your Upgrade? The 3-Step 12V Check
Once you know what PSU you have, here is a simple way to see if it can handle your current parts or a new graphics card. No fancy calculator needed.
Step 1: Find your real 12V power. Multiply the +12V amps on the label by 12. If the label already shows a combined 12V wattage, use that.
Example: 30A x 12 = 360W on the 12V rail.
Step 2: Add up what your main parts need.
- GPU: use the board power or TGP from the maker’s spec page, or the reading from GPU-Z under load.
- CPU: use the maker’s power rating, or the CPU package power from HWiNFO under load.
- Everything else: add about 75 to 100W for the motherboard, RAM, drives, fans and USB devices.
Step 3: Add headroom and compare. Multiply your total by 1.25 to leave about 25 percent headroom for power spikes and aging. Your PSU’s 12V power should be at least that number. Also check that it has the right GPU connectors and follow your graphics card maker’s recommended PSU wattage.
Here is what happened with Tyler’s build:
| Part | Power |
|---|---|
| New graphics card | 220W |
| CPU | 125W |
| Everything else | 75W |
| Total | 420W |
| With 25% headroom | 525W |
| Tyler’s PSU on 12V (30A x 12) | 360W ⚠ Not enough |
His PSU could deliver about 360W on 12V, while his build needed around 420W under load and about 525W to be safe. Every time the game pushed his GPU hard, the PSU’s protection shut everything down. That is exactly the “sudden black screen” he saw. A quality 650W unit fixed it the same day.
7 Red Flags That Say It Is Time to Replace Your PSU
Now that you know what PSU you have, look out for these warning signs. Any one of them is a good reason to replace it, especially before a GPU upgrade. Our PSU tier list ranks quality replacements at every budget.
- No brand or no label at all. Unknown units often overstate their wattage and skip protection features.
- It is more than 7 to 10 years old, or older than its warranty. Parts inside wear out with age and heat.
- Random shutdowns or restarts under load, like Tyler’s, especially during games or heavy work.
- Coil whine, buzzing or a grinding fan that is new or getting worse.
- A burning smell, scorch marks or a bulging case. Switch off and unplug the PC immediately.
- Not enough connectors for your new GPU, forcing you to use multiple adapters or splitters.
- No 80 PLUS or Cybenetics rating on a gaming PC. It is not always unsafe, but it is a strong hint of a budget unit.
If you are replacing it, our guide on modular vs non-modular PSU explains which design fits your build and budget.
What About Laptops and Mini PCs?
Laptops and most mini PCs do not have an internal PSU like a desktop. Their power supply is the charger brick or adapter.
- Read the brick’s label. Look for the Output line, for example “20V 6.75A”. Multiply volts by amps to get watts: 20 x 6.75 = 135W.
- USB-C chargers usually print their maximum wattage, such as 65W, 100W or 140W.
- Replacing a laptop charger? Match the output voltage and connector, and choose the same or higher wattage. A weaker charger can make a gaming laptop throttle or drain the battery while plugged in.
- Lost the charger? Look up your laptop’s model on the maker’s support site to find the original adapter.
How to Check What PSU You Have: FAQs
Can I check what PSU I have in Windows 11?
Not for a normal power supply. Windows, Device Manager and Task Manager cannot see it. Only digital PSUs with a USB connection show up in tools like HWiNFO or the maker’s app.
How do I check my PSU wattage without opening my PC?
Check your box, receipt or online order history, look through the case vents with a flashlight, or, for a prebuilt PC, search its service tag or model on the maker’s support site.
Can HWiNFO, CPU-Z or GPU-Z show my PSU?
CPU-Z and GPU-Z never show the PSU. HWiNFO shows it only for supported digital PSUs. All of them can show how much power your CPU and GPU use, which helps you size a new one.
Where is the label on a power supply?
Usually on the side facing the glass panel or on the top. In some cases it faces the inside or the bottom, so you may need a flashlight, your phone camera or to slide the PSU out slightly.
Is a higher wattage PSU always better?
No. Buy enough wattage with healthy headroom, but quality, the 12V rating, certifications and protection features matter more than a big number on the box.
How long does a PSU last?
A quality unit often lasts 7 to 10 years or more, and good brands back that with long warranties. Budget units can wear out sooner, especially in hot rooms or dusty cases.
Is it safe to open my PC to check the PSU?
Yes, if you switch off and unplug the PC first and only remove the side panel. Never open the power supply’s own metal case.
Final Thoughts: Know Your PSU Before It Surprises You
Tyler’s problem was never his new graphics card. It was a cheap, forgotten 450W power supply that nobody had looked at in years. Ten minutes with a flashlight and a screwdriver told him more than every piece of software on his PC.
Now you know how to check what PSU you have in six ways: the box or order history, a peek through the vents, a service tag lookup, software for digital units, the label inside the case, and detective clues when all else fails. Start with the easiest, and when in doubt, read the label. Then use the 12V check to make sure your power supply can handle what you are asking of it.
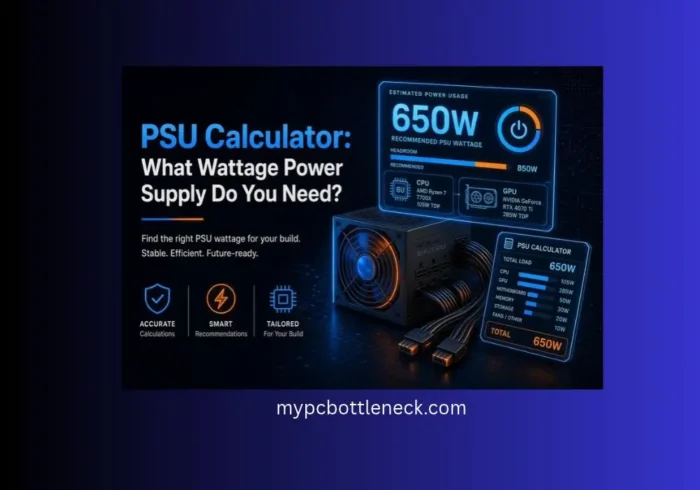
Planning an upgrade? Before you buy, run your CPU and new GPU through our free PC bottleneck calculator to make sure they are a good match, then use our PSU calculator to size your power supply for that pair.
Sources
- HWiNFO forum: PSU monitoring and supported PSUs
- Linux kernel docs: Corsair HXi and RMi PSU monitoring
- Dell Community: finding the installed power supply by Service Tag